This Thumbprint Cookies with Icing recipe is a shortbread style walnut cookie with a delicate orange flavor in the powdered sugar icing.
The nostalgia that hits me each holiday season got me remembering thumbprint cookies with icing. A search through my family recipe cards didn’t find a recipe. But I’m sure I remember my Grandma and Mom making similar cookies. They aren’t here for me to ask unfortunately, so I did some research.
Want to save this recipe?
Enter your email & I'll send it to your inbox. Plus, get great new recipes from me every week!
This recipe is a combination of several recipes I found on Google. Plus my own unique twist of using orange zest and juice to flavor the cookies and frosting. Oranges are plentiful around here in the winter season. I always have some in my refrigerator. And orange flavor pairs really well with walnuts.
I’m so pleased with how these cookies turned out! They aren’t picture perfect. Using your thumb to shape these cookies (as implied by the name thumbprint) makes them not perfectly round. But I think that adds to their charm. They certainly taste delicious. I’m excited to add these to my cookie recipe collection.
Why this recipe works
Thumbprint cookies are similar to a shortbread cookie dough. There’s no baking soda or powder for leavening. In other words, these cookies aren’t supposed to rise. Just hold their shape as they bake. Leaving a little well in the middle to be filled with frosting.
In this case, I made a simple powdered sugar and orange juice glaze. If you have some leftover buttercream icing, make a batch of these cookies to use it up!
Or you could fill the cookies before baking with your choice of jam. I think raspberry would be the best flavor pairing with the orange and walnuts in these cookies.
You could even fill these cookies with a chocolate icing like this one. These cookies are so delicious and can be really versatile!
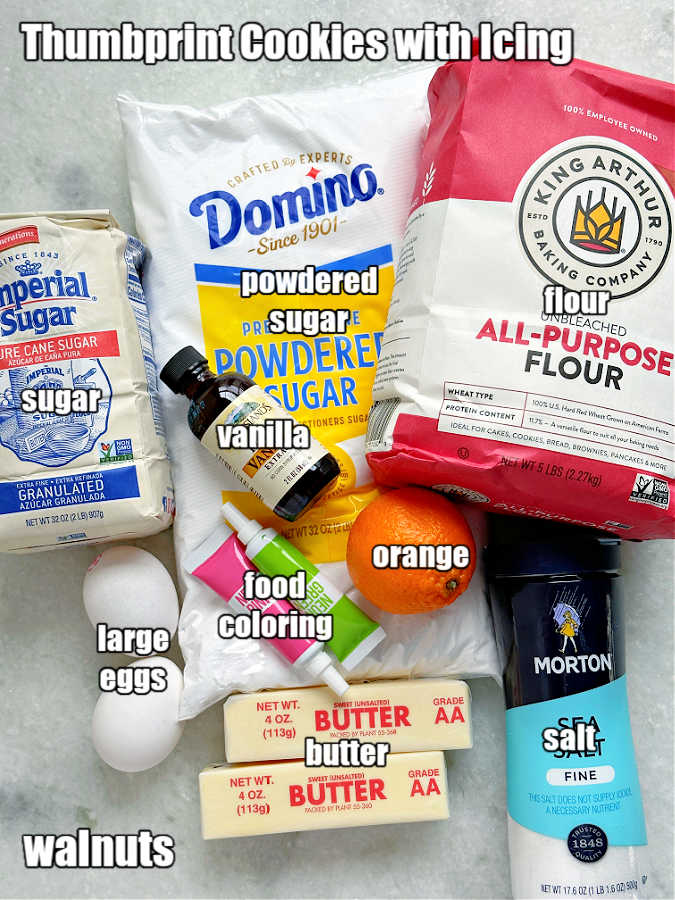
Ingredients for thumbprint cookies with icing recipe
- Flour – use all-purpose flour. Sifting the flour through a whisk helps to make a cookie that is more delicate and tender in texture.
- Butter – use unsalted butter that has been softened to room temperature. I always think butter is much preferable to shortening for homemade cookies.
- Sugar – use granulated sugar, not brown sugar for this recipe.
- Vanilla – pure vanilla extract like this brand is my favorite for baking cookies.
- Eggs – both large eggs need to be separated for this recipe. The egg yolks are mixed into the batter. The egg whites help the walnuts stick to the cookies.
- Water – the water is mixed with the egg whites to help the walnuts stick.
- Walnuts – use unsalted and roasted walnuts that have been finely chopped. You can use a hammer, food processor or knife for this.
- Salt – helps to balance the sweet flavors of the cookies.
- Powdered Sugar – also known as icing sugar.
- Orange Zest and Juice – orange zest is mixed in with the flour. Orange juice is helped to make the frosting. You can use fresh squeezed orange juice or bottled juice.
- Food Coloring – you can color these cookies for any occasion!
Instructions for making thumbprint cookies with icing
I have a lot of pictures to help illustrate the process of making these cookies.
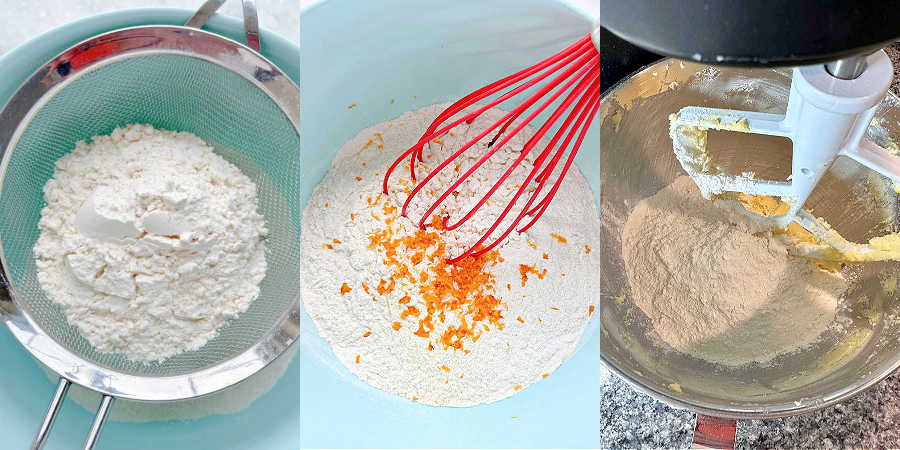
Sift the flour and salt together, zest the orange. Whisk the zest into the flour.
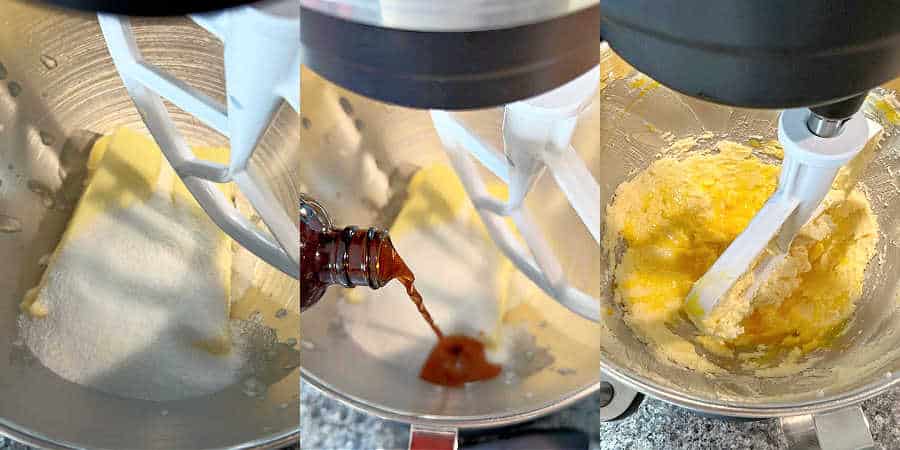
Cream together the butter and sugar. Add the vanilla and egg yolks. Beat until light and fluffy.
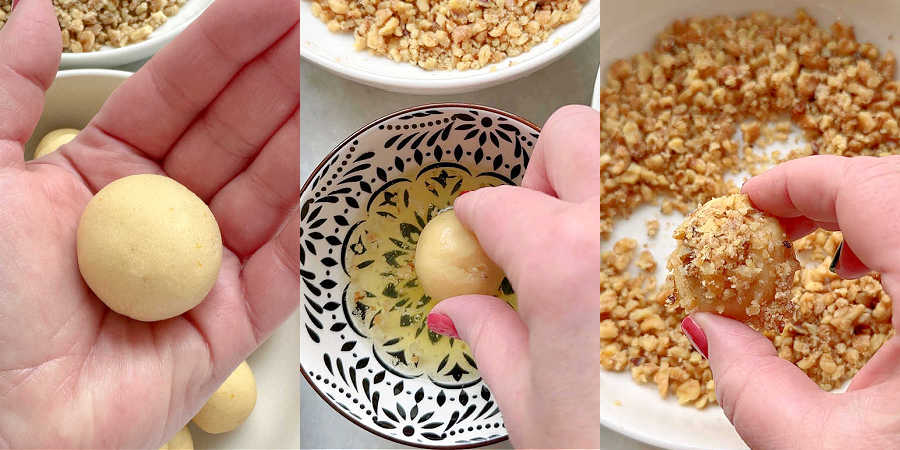
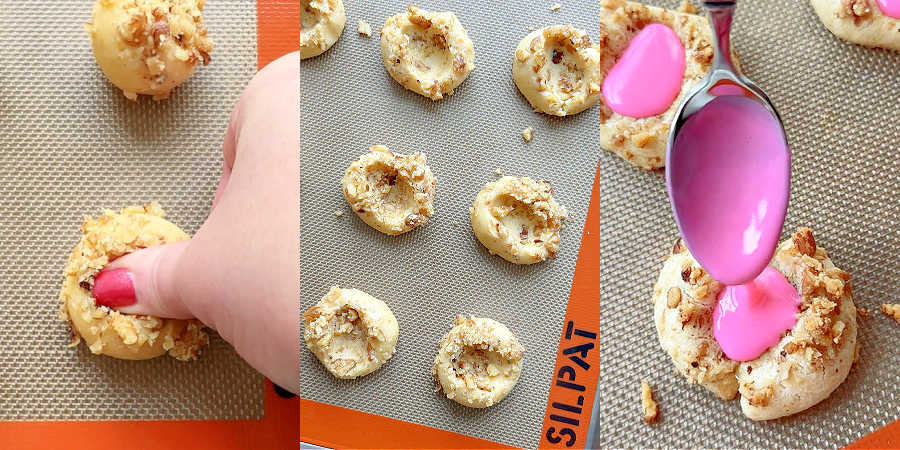
Form the dough into balls and chill them in the refrigerator for 30 minutes. Dip them in the egg white and water mixture. Dip the top halves into the chopped walnuts. Place them on the cookies sheets and use your thumb to gently make a well in the center of each cookie.
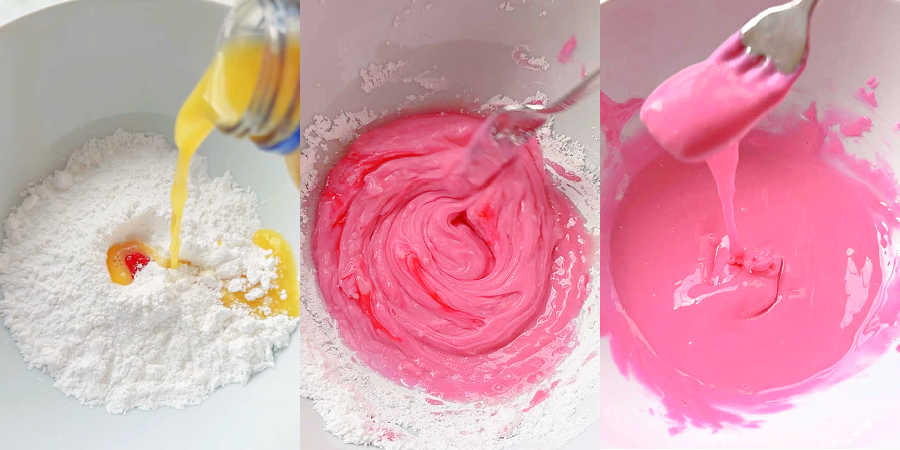
While the cookies are cooling, make the icing. Add food coloring and one tablespoon of orange juice at a time to the powdered sugar. Stir until a smooth icing (not runny) is achieved. Then fill each cooled cookie with the icing. Allow the frosting to set up before storing the cookies.
Frequently asked questions
Why do you chill cookies before baking?
Some of my cookies don’t require chilling. But in the case of thumbprint cookies, you want them to hold their shape. Chilling cookie dough before baking solidifies the fat in the cookies. As the cookies bake, the fat in the chilled cookie dough takes longer to melt than room-temperature fat. And the longer the fat remains solid, the less cookies spread.
Does parchment paper stop cookies from spreading?
Yes. Giving your cookies something with friction to cling onto, so to speak—like an ungreased baking sheet or one lined with parchment or Silpat baking mats—can slow the spreading. A greased sheet just encourages hot, melting cookie dough to run further.
Why is my cookie dough cracking?
Dough that is too dry will crack when baked in the oven. As you can see in my pictures, a few of my cookies did crack a bit around the edges. In the case of these thumbprints, the cracking is more a result of making my indentation a little too deep. So be mindful when using your thumb to make the cookie indentions. Gentle pressure is best.
Storage Directions
Keep these cookies in a cookie tin or other type of airtight container on your counter for a few days. These also freeze well. Place them in layers in an airtight container. Be sure and separate the layers with sheets of wax paper. They will stay fresh in the freezer for up to one month.
Kitchen Tools
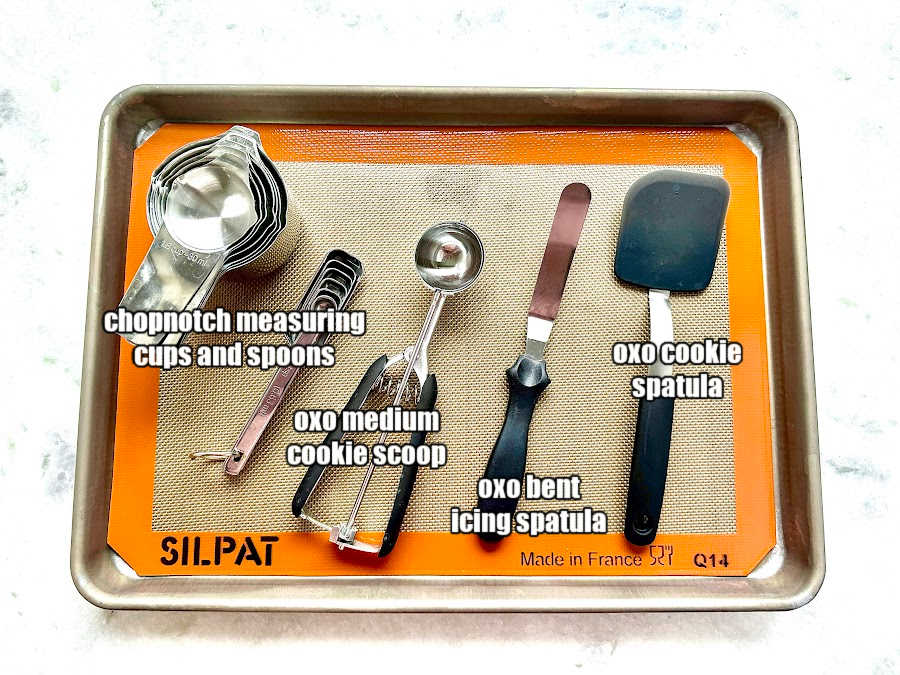
I have been baking cookies for many years. These are my favorite, time-tested tools…
- Nordic Ware Commercial Half Sheet Pans
- Silpat Silicone Baking Mats
- OXO Medium Cookie Scoop
- Chopnotch Measuring Cups and Spoons
- OXO Bent Icing Spatula (for leveling off flour and sugar)
- OXO Cookie Spatula
More Christmas cookie recipes
- White Chocolate Peppermint Cookies
- Chocolate and Peanut Butter Chip Cookies
- Pecan Snowball Cookies
- Peanut Butter Blossoms
- Santa Sugar Cookies
Thumbprint Cookies with Icing
Ingredients
- 2 1/4 cup all-purpose flour
- 16 tbsp unsalted butter
- 2/3 cup granulated sugar
- 1 1/2 tsp vanilla extract
- 2 lg eggs separated
- 1 cup walnuts finely chopped
- 1/2 tsp salt
- 1 tbsp orange zest
- 1 cup powdered sugar
- 2 tbsp orange juice
- food coloring
Instructions
- Preheat the oven to 350 degrees F.
- In a large mixing bowl with a hand mixture or in the bowl of a stand mixer with the paddle attachment, whip together the softened butter with the 2/3 cup of granulated sugar until light and fluffy. Scrape down the bowl if necessary.
- Add the vanilla extract and the two egg yolks. Whip again until completely combined and fluffy.
- In a separate bowl, sift the flour and the salt together. Add the orange zest and whisk gently until combined.
- Add the flour mixture to the butter mixture and mix on low speed until a cohesive dough is formed.
- Use a small cookie scoop to evenly divide the cookie dough into balls. Gently roll each ball in your hands until smooth.
- Place the cookie dough balls on a clean plate or in a shallow bowl. Cover with plastic wrap and chill for 30 minutes.
- Whisk the two egg whites together with the two teaspoons of water.
- Place the finely chopped walnuts into a clean, shallow bowl.
- Dip the top half of each chilled cookie dough ball into the egg white and water mixture. Then dip them into the walnuts, pressing gently so the top half of the cookies are coated in the walnuts.
- Place 12 cookies on each cookie sheet lined with parchment paper or silicone baking mats.
- Use your thumb to gently press an indentation into the center of each thumbprint cookie.
- Bake the cookies for 14 - 16 minutes, or until just set. Be sure and rotate the pans back to front and top to bottom halfway through baking time.
- Allow the cookies to cool completely on the baking sheets.
- While the cookies are cooling, make the frosting.
- If you are making two colors, place 1/2 cup powdered sugar into each of two bowls. Add a little food coloring to each bowl. Add one tablespoon of orange juice to each bowl. Stir the powdered sugar, orange juice and food coloring together vigorously until a smooth icing forms.
- Use a small spoon to fill each cooled thumbprint cookie with a small amount of icing. Allow the icing to set up before storing or eating the cookies.
Nutrition
Foodtastic Mom is a participant in the Amazon Services LLC Associates Program (Amazon Associate), an affiliate advertising program designed to provide a means for sites to earn advertising fees by advertising and linking to Amazon.com. Any highlighted, clickable Amazon link you see is an affiliate link that I may earn advertising fees on when you click for purchases.
Thank you so much for being a faithful reader and supporter of Foodtastic Mom. Be sure to PIN to Pinterest and print this recipe! Also like and tag ‘Foodtastic Mom’ on Facebook and Instagram if you make this recipe!








Tavo says
The cookies were great and I love that they are super colorful! thanks for the recipe! I loved the orange flavor!
foodtasticmom says
You’re welcome. Thanks for the positive review!
Beth says
These cookies are the best! I love that with a quick change to the icing color they can be enjoyed during any holiday!
foodtasticmom says
Exactly. The colors can change for any occasion. These would be great for a baby shower or wedding shower too!
Kathryn says
These thumbprint cookies are so good and easy to make! I love the color middles and orange zest flavor. Going to make again for Christmas!
foodtasticmom says
So glad you enjoy the flavors in these cookies. Thanks for taking the time to rate and review.
Tayler says
My kids loved helping me make these cookies today! We used red and green to make them festive.
foodtasticmom says
So glad you enjoyed making these cookies with your children. Happy Holidays!
Tara says
These cookies are ADORABLE! Absolutely love the colorful icing. So festive and fun!!
foodtasticmom says
Thanks Tara! I appreciate the kind words!