Step by step and expert tips for how to make a salami rose and rosebuds to help decorate a cheese or snack board for your next party.
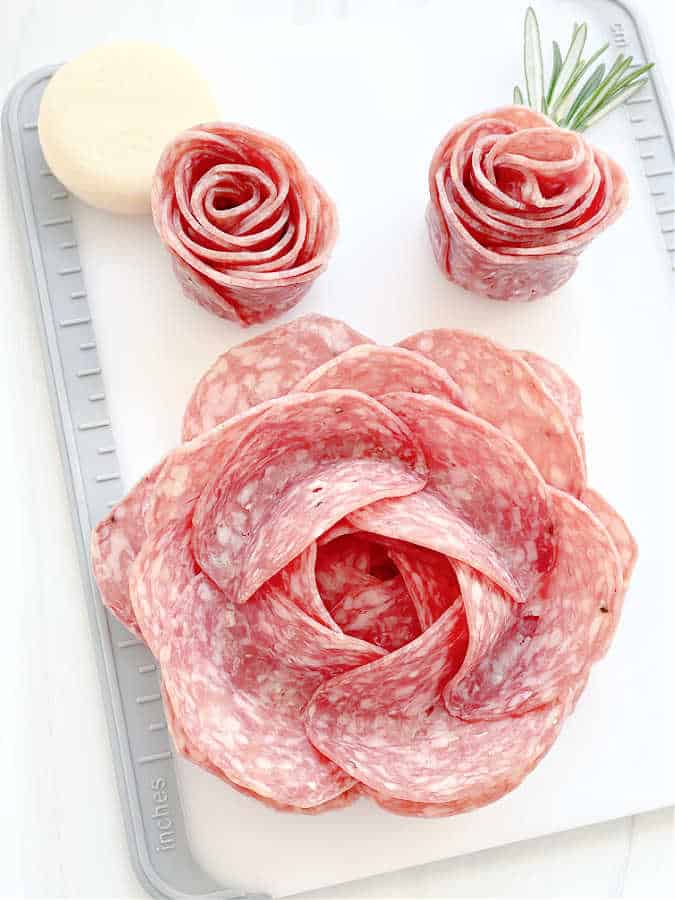
I used to cater as a side hustle. Back when I was younger and had a lot more energy and hustle in general. I don’t remember charcuterie being as popular then as it is now. But in the past couple of years, I keep seeing beautiful cheese boards and other food displays. Fancy meat roses always seem to make an appetizer appearance. And I wonder how the caterers create them. Turns out, it’s very easy to do! I’m showing you how so you can make your own impressive charcuterie board at home. It’s much cheaper to make them yourself. And I personally love charcuterie as dinner in front of a movie at home on the weekend. Here is a simple one I made for photographing my Bourbon Mule recipe.
Want to save this recipe?
Enter your email & I'll send it to your inbox. Plus, get great new recipes from me every week!
Why this recipe works
Any thinly sliced meat of your choosing, like salami and pepperoni, can be shaped to look like roses. Cured meats tend to hold their shape best. So that’s why you see roses and rosebuds made most often from pepperoni and salami. Place a couple on a board with some cheese, olives and crackers. They are a quick and fun way to make the display look more appealing!
Ingredients for meat roses
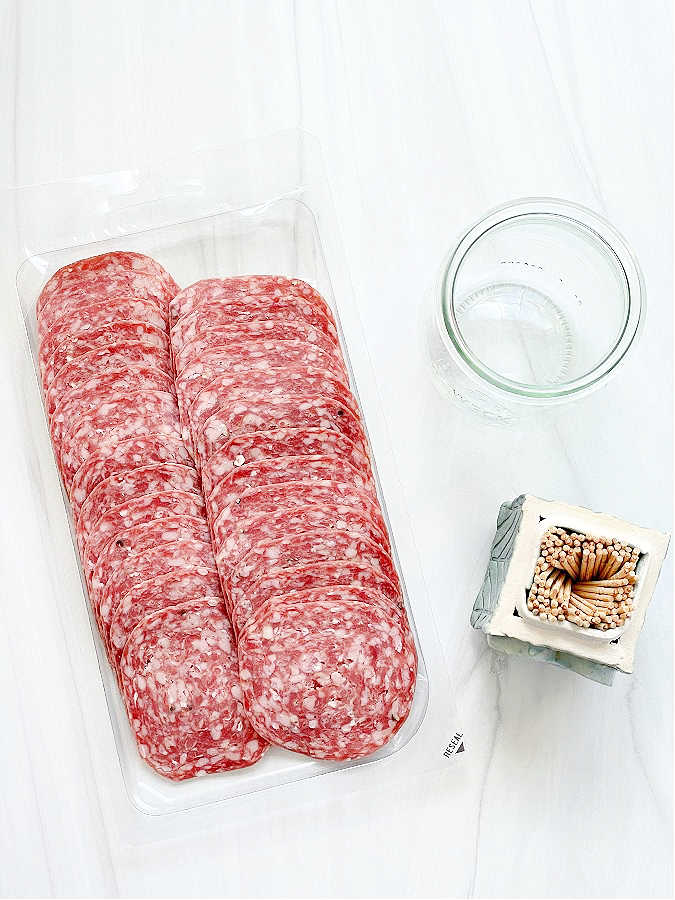
- Salami – depending on the size of your glass opening, you’ll need 12 – 24 salami slices per large rose. For the smaller rosebuds, you need six slices per bud.
- Glass – I like using a glass with a smaller opening, similar to a small juice glass. But you can make these roses with a wine glass as well.
- Pepperoni – Use larger slices of pepperoni for the roses. Use smaller slices for the rosebuds.
- Toothpicks – You’ll need these for making and securing the rosebuds.
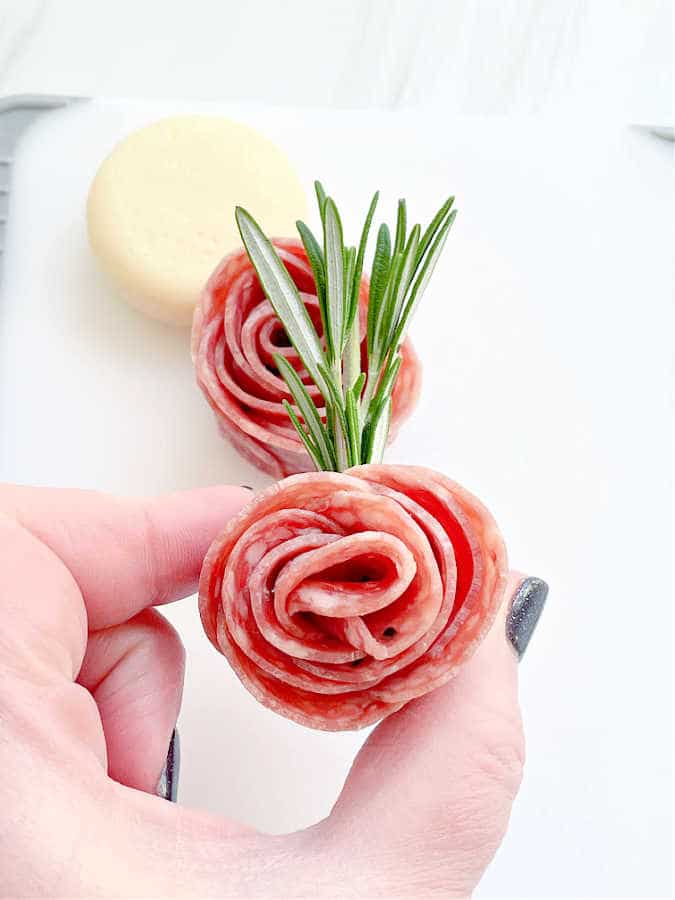
- Garnish – I like to garnish my meat rosebuds with something to hide the exposed end of the toothpick. Olives and small cheese rounds are good choices. Or instead of a toothpick, you can use a sturdy sprig of fresh rosemary.
How to make a salami rose
- Salami roses are easier to make if your pieces of salami are not straight out of the refrigerator. Set your salami on the counter about 20-30 minutes before you plan to make your roses.
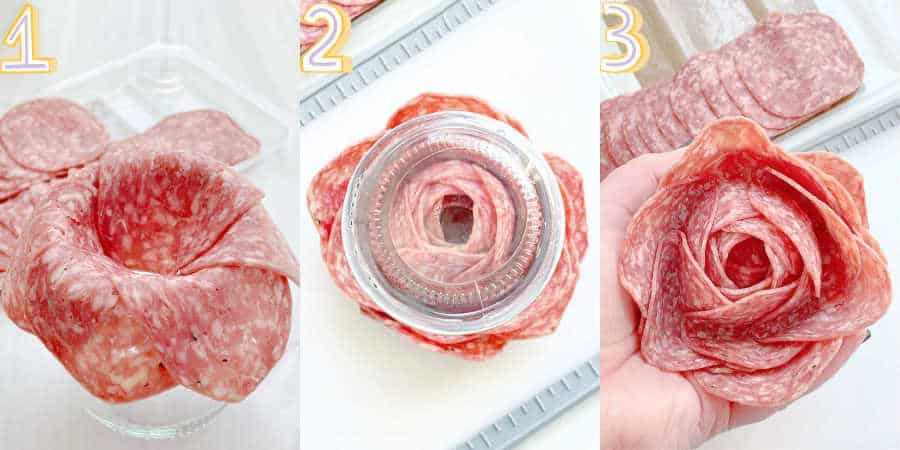
- On a clean glass, place one slice of salami half in and half out of the glass. Press down so it adheres to the rim of the glass. Rotate clockwise and place a second slice of salami a third of the way overlapping the first slice. Repeat until the entire circumference of the glass is covered and you have a first layer.
- Continue adding layers of salami, pressing down as you go, until the center of your glass is full. I usually make three to five layers. Sometimes six layers if my glass is larger.
- Invert the glass onto a clean cutting board or plate. Press down and kind of twist to release your glass from the salami rose.
How to make a salami rosebud
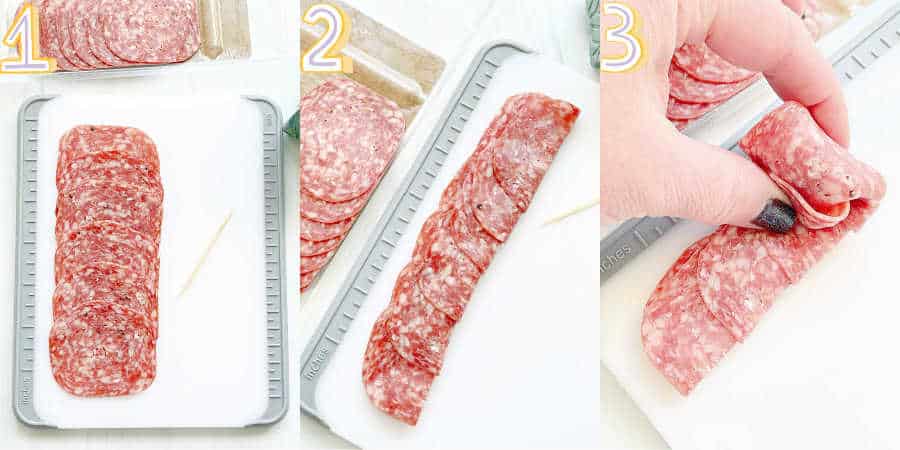
- Layer six slices of salami (or pepperoni) so that each slice is covering about a third of the next slice underneath. See picture for guidance.
- Fold the six slices in half, lengthwise.
- Roll up the layers of salami so it forms a tight, nice roll, like a rosebud shape.
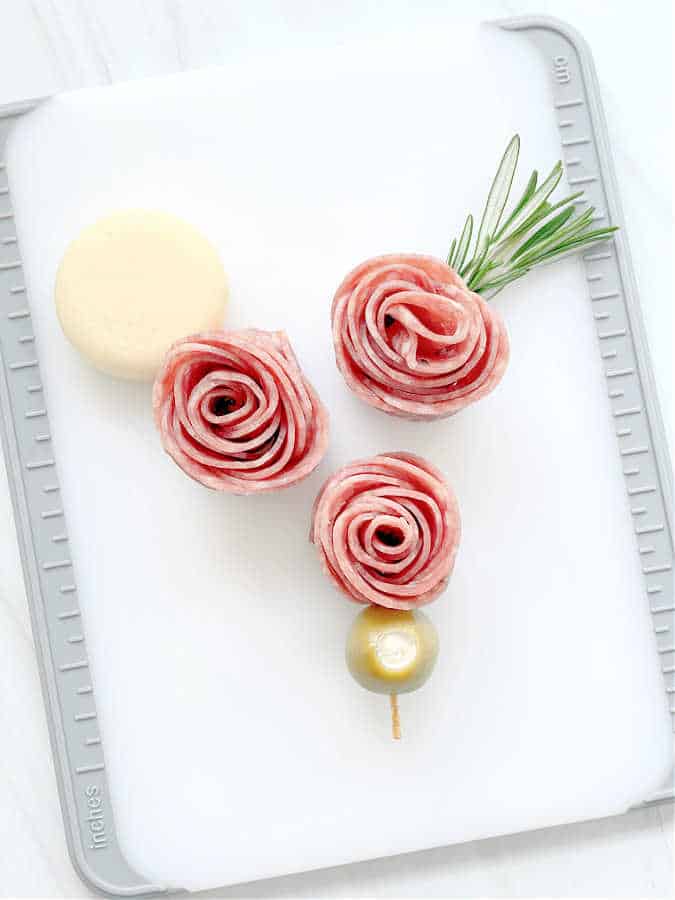
- Secure the rosebud with a toothpick at the bottom (straight side) of the bud.
- Garnish the exposed end of the toothpick with olives, cheese, cherry tomatoes, grapes, etc.
- Or use a sturdy sprig of fresh rosemary to secure the rosebud, instead of a toothpick.
FAQ’s
- How many slices of salami does it take to make a salami rose?
It depends on the size of your glass. Anywhere from 12-24 slices. - Can you make salami roses ahead of time?
I prefer to make them the same day I plan to use them. But continue reading for storage directions if you prefer to make them in advance. - Can you make roses with pepperoni?
I like using the larger slices of pepperoni to make pepperoni roses. The slices of pepperoni you find on pizza are too small for the full size roses. But you can use them to make the rosebuds.
Pro Tips
- Use a clear glass so you can see from both sides how you are layering the salami.
- A smaller glass works best like a juice glass, a champagne glass or these Weck jars.
- The salami or pepperoni will hold it’s shape better if it’s not as cold. Be sure and get it out of the refrigerator for 20 minutes or so before making the roses.
Serving Suggestions
- Use on a pretty snack board display with fresh fruit, crackers, nuts, cheese, bread and jam.
- You could make a deli tray and impress guests with roses of ham, roast beef and turkey. To use these types of meat for the roses, cut the slices first into round deli meat shapes with a circle cookie cutter.
- Make a fancy charcuterie board for Mother’s Day.
Storage Directions
- Roses – keep them stored on the glass as you made them. Wrap tightly in saran wrap. Refrigerate for up to one day. This is a bit tedious, so I recommend making the larger salami roses on the day you plan to serve them.
- Rosebuds – place them in an airtight container. Refrigerate for up to two days. These store well and can more easily be made ahead than larger roses.
Kitchen Tools
- Weck jars for shaping the roses
- Juice glasses for shaping the roses
- Toothpicks for securing the smaller roses
Foodtastic Mom is a participant in the Amazon Services LLC Associates Program (Amazon Associate), an affiliate advertising program designed to provide a means for sites to earn advertising fees by advertising and linking to Amazon.com. Any highlighted, clickable Amazon link you see is an affiliate link that I may earn advertising fees on when you click to purchase.
Thank you so much for being a faithful reader and supporter of Foodtastic Mom. Be sure to PIN to Pinterest and print this recipe!




MacKenzie says
Perfect for my Thanksgiving Charcuterie board.
foodtasticmom says
Definitely, enjoy!
Jen says
I loved all the tips included in this tutorial. I made the salami roses the day before and kept them in the refrigerator overnight. It made party prep easier the next day!
foodtasticmom says
So glad these worked out for you!
Beth says
These will be perfect for my Christmas charcuterie board! Easy instructions, thanks!
foodtasticmom says
You’re welcome!
Mahy says
Such a cute easy way to make a small gathering extra special. Fantastic result!
foodtasticmom says
Thank you!